1
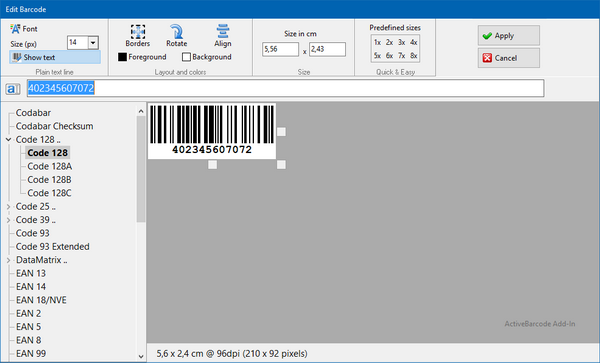
Select a barcode type

Barcode type
Select the appropriate barcode symbology here.
2
Enter or change the character string to be encoded

Text

3
Adjust size

Size in cm/inch

Set the size of the barcode in cm/inch
Predefined sizes
Here you can quickly and easily select an automatically calculated barcode size.
4
Other optional settings


Font

Select the font for the barcode text.
Showtext

Decide whether the human readable text line is included or not.
Borders

Change the width and height of the borders an the notch length here.
Rotate

Select the orientation of the barcode in 90 degrees steps.
Alignment

Switches the alignment of the barcode.
Foreground color

Select the foreground color for the barcode.
Background color

Select the background color for the barcode.
5
Use barcode

Apply
Click on Apply to apply the barcode or the changes to the Office document.
Cancel
Click Cancel to discard the barcode or changes and return to the Office document.


