Embed and automate a barcode in a Word document
Word 365, 2024, 2021, 2019, 2016, 2013, 2010
1
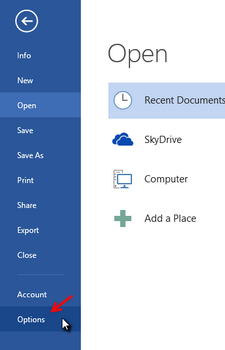
First, launch Word and create or open a document. Make sure that you have configured Word so that the Developer tab is shown in the ribbon. If not, go to Word Options. Click on the File tab. This will take you to the backstage view. Then, click Options on the left.
2
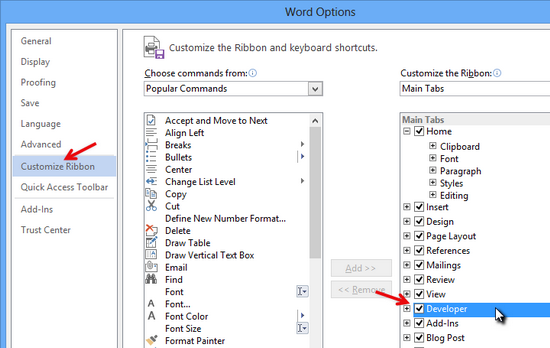
Under Customize Ribbon, enable the Developer option on the main tabs, then close the options window.
3
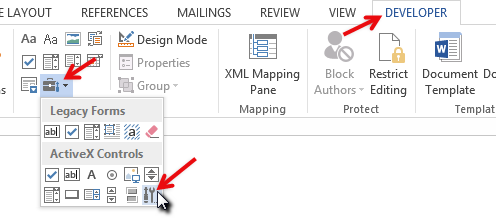
You can now embed the ActiveBarcode control element into your document. Select the Developer tab. Click the Insert button from the ActiveX Controls range, and then select More Controls.
4
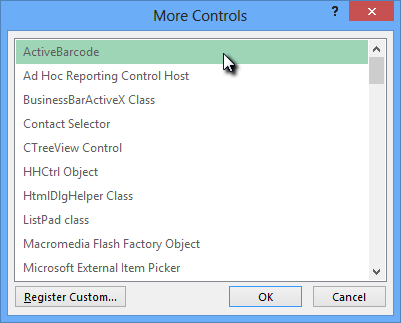
A dialog box appears on the screen:
5
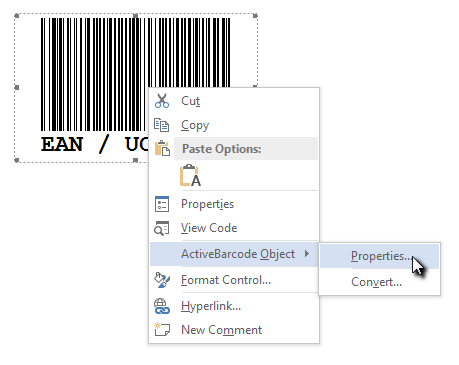
Select ActiveBarcode and click OK. A barcode will now be created inside your document. It will be a standard EAN-128 barcode. This is the default type. You can change it to any barcode type supported by ActiveBarcode: QR Code, GS1/EAN-128, Data Matrix, GTIN/EAN-13, Code 39, Code 93, GS1-Data Matrix, Code 128, PDF417, DUN-14, EAN-8, EAN-14, EAN-18, ISBN, ITF-14, NVE, PZN8, SCC-14, SSCC-18 ...You can now modify this barcode. You can change the type, text, colors, etc. To do so, right-click inside the barcode. A pop-up menu will open:
6
Select ActiveBarcode Object followed by Properties. The ActiveBarcode property dialog will open. You can modify the barcode however you like here.