Mail merge with barcodes from the cloud
for Microsoft® Word® 365, 2024, 2021, 2019, 2016, 2013, 2010
1
Open an existing mail merge document or create a new one.
If the field codes are not visible, press Alt+F9 to make the field codes visible in your Word mail merge document.
Your document may look like this:
MailMerge Demo with ActiveBarcode Cloud (API)
Name: «Name»
Productcode: «Productcode»
Name: «Name»
Productcode: «Productcode»
2
Now, we want to add a barcode that is bound to the Productcode data field from the data source. To do this, we need to add a field code for the barcode. Press Ctrl + F9 to create a real field pair { }. Do not type yourself!
MailMerge Demo with ActiveBarcode Cloud (API)
Name: «Name»
Productcode: «Productcode»
{ }
Name: «Name»
Productcode: «Productcode»
{ }
3
Now type the field code INCLUDEPICTURE and directly behind this, you create a new real field pair.
So, press Ctrl + F9 to create a new real field pair { }. Do not type yourself!
MailMerge Demo with ActiveBarcode Cloud (API)
Name: «Name»
Productcode: «Productcode»
{ INCLUDEPICTURE { } }
Name: «Name»
Productcode: «Productcode»
{ INCLUDEPICTURE { } }
4
Now type the field code IF TRUE and add the URL to the ActiveBarcode Cloud in quotes. You can generate a proper URL using our Online Barcode Generator (click here to open). You do not enter any data or text for the text property, as we will bind this to the data source in the next step.
You also add double quotes at the end after a space. It looks like this now:
MailMerge Demo with ActiveBarcode Cloud (API)
Name: «Name»
Productcode: «Productcode»
{ INCLUDEPICTURE { IF TRUE "https://api.activebarcode.net/v2/png?code=CODE128&width=400&height=200&access=YOUR-KEY-HERE&text=" "" } }
Name: «Name»
Productcode: «Productcode»
{ INCLUDEPICTURE { IF TRUE "https://api.activebarcode.net/v2/png?code=CODE128&width=400&height=200&access=YOUR-KEY-HERE&text=" "" } }
5
Place your cursor right next to the text property between the = and the quote.
Press Ctrl + F9 to create a new real field pair { }. Do not type yourself!
Enter the field code MERGEFIELD between the brackets followed by the data filed name from your data source.
Finally add \d at the end.
MailMerge Demo with ActiveBarcode Cloud (API)
Name: «Name»
Productcode: «Productcode»
{ INCLUDEPICTURE { IF TRUE "https://api.activebarcode.net/v2/png?code=CODE128&width=400&height=200&access=YOUR-KEY-HERE&text={ MERGEFIELD Productcode }" ""} \d }
Name: «Name»
Productcode: «Productcode»
{ INCLUDEPICTURE { IF TRUE "https://api.activebarcode.net/v2/png?code=CODE128&width=400&height=200&access=YOUR-KEY-HERE&text={ MERGEFIELD Productcode }" ""} \d }
6
Press Alt+F9 to toggle the field codes and show the data in your Word mail merge document.
Finally use the function Finish & Merge to create or print your documents.

7
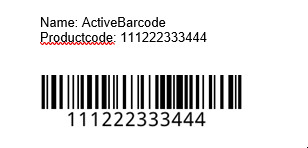
Done!
Remember: Do not copy & paste or type the field seperators: {}
Always create them by using Ctrl + F9!